Each year we climb Kilimanjaro as a Radiating Hope team. We have climbers from a wide range of backgrounds and skill levels-- cancer survivors to caregivers. Many of the climbers on this annual climb have no climbing background and some have never even slept in a tent! One of our climbers said, "My idea of a climb was walking from the beach to the bar. Climbing Kilimanjaro was one of the best, most unique experiences of my life!"
Contact us to reserve your spot on the climb. No prior experience is necessary – but you must be willing to train to be in the best shape of your life! If you are unable to join us for the climb, consider sponsoring a prayer flag in honor of someone you love. You can also schedule your own Kilimanjaro climb independent of our annual team trip with our partner guide service, with your trip still supporting Radiating Hope!
Climbing a mountain is a perfect symbol of an individual patient’s battle with cancer. Oftentimes, as you climb higher and higher, you feel the physical strain of the climb, as well as the occasional sickness that goes along with high altitudes. Yet you climb on! The summit in your sights, you push through physical pain, mental exhaustion and push yourself to new physical and emotional heights- to achieve an exhilaration unlike any you've thus experienced!
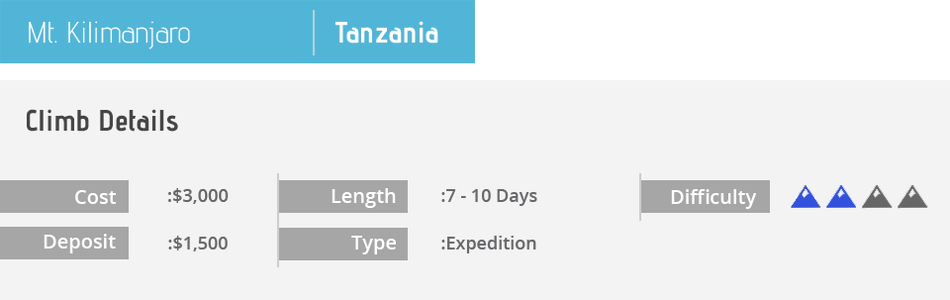
Each year a select group of largely amateur mountaineers will climb the tallest mountain on the African continent in a fundraising endeavor to bring cancer services to the surrounding community in Moshi, Tanzania. No cancer center currently exists in that region of Tanzania. All funds raised through this climb will go directly to the building of this cancer center. Our team will carry prayer flags in honor of those who have faced the struggle of cancer head on. High at the summit, we fly these flags, which are inscribed with names of individuals who have in some way been affected by cancer.
Contact us to reserve your spot on the climb. No prior experience is necessary – but you must be willing to train to be in the best shape of your life! If you are unable to join us for the climb, consider sponsoring a prayer flag in honor of someone you love. You can also schedule your own Kilimanjaro climb independent of our annual team trip with our partner guide service, with your trip still supporting Radiating Hope!
Climbing a mountain is a perfect symbol of an individual patient’s battle with cancer. Oftentimes, as you climb higher and higher, you feel the physical strain of the climb, as well as the occasional sickness that goes along with high altitudes. Yet you climb on! The summit in your sights, you push through physical pain, mental exhaustion and push yourself to new physical and emotional heights- to achieve an exhilaration unlike any you've thus experienced!
Each year a select group of largely amateur mountaineers will climb the tallest mountain on the African continent in a fundraising endeavor to bring cancer services to the surrounding community in Moshi, Tanzania. No cancer center currently exists in that region of Tanzania. All funds raised through this climb will go directly to the building of this cancer center. Our team will carry prayer flags in honor of those who have faced the struggle of cancer head on. High at the summit, we fly these flags, which are inscribed with names of individuals who have in some way been affected by cancer.
Day 1: Arrival
Kilimanjaro International Airport where you will be met by our Climb Kili representative and transferred to your hotel. After check in, you will have a detailed meeting with your guide outlining the trek ahead. Overnight stay in bed and breakfast.
Day 2: Mondorossi Gate to MTI Mkubwa
7,742’~2,360m | 3 mi~4.8 km | 3-4 hrs
After a restful night at the hotel, we begin our trek from western side checking in at the Londorossi gate with a starting altitude of 7,742’~2,360m. The trail with gently ascend through the montane forest until you are welcomed into camp under the Climb Kili banner with tents set up and your personal belongings inside. Tonight’s camp is nestled in the Kilimanjaro rain forest at the Mti Mkubwa which in Swahili means Big Tree.
Day 3: MTI Mkubwa to Shira Camp
11,500’~3,505m | 4.5 mi~7.3 km | 6-8 hrs
Departing the rain forest, we enter the heath and moorland zone. In the afternoon we follow the Shira ridge the vast high altitude desert plateau where the first views of Mt Kilimanjaro open on the horizon and the landscape is a magnificent contrast from the departed rain forest.
Day 4: Shira Camp to Moir Camp
13,650’~3,818m | 6.3 mi~10.1 km | 6-8 hrs
Full day exploration of the Shira plateau. Trek east toward Kibo’s glaciated peak with the option to visit the ancient collapsed Shira
cone, the oldest of Kilimanjaro’s three volcanoes. We arrive at Moir Camp situated in a huge gorge at the end of a dormant lava flow.
Day 5: Moir Camp to Barranco Camp
12,950’~3,916m | 6.2 mi~10 km | 5-7 hrs
Today we take an acclimatization trek to the Lava Tower at 15,000’~4,500m. Following our rest at the tower, we decent upon the enormous Senecio forest reaching waterfall prior to finishing at Barranco Camp. Tonight’s camp is in the shadow of the massive Barranco wall with the breeze often carrying clouds from the Barranco Valley.
Day 6: Barranco to Barafu Camp
15,200’~4,630m | 3.4 mi~5.4 km | 3-5 hrs
Slowly trek to Barafu Camp. from Barafu you will have excellent views of Kibo and Mawenzi peaks. Barufu Camp is situated on an exposed ridge providing majestic sunsets ushering in the summit night. We acclimatize and make necessary preparation for the summit day ahead.
Day 7: Barafu to Summit to Mweka Camp
19,340’~5,895m | 13 mi~21 km | 12-14 hrs
Tonight is the night! A midnight start to conquer the highest point in Africa. This section of the route is considered one of the steepest on the non-technical paths of Kilimanjaro. It is a 6-7 hour hike to Stella Point in order to see the sunrise. From Stella Point it is a 1 hour to Uhuru Peak and the rooftop of Africa. We then descend down to Mweka Camp for dinner and celebration.
Day 8: Mweka Camp to Exit
Mweka Gate 5,400’~1,620m | 3.7 mi~5.9 km | 3-4 hrs
A morning walking to Mweka gate reflecting of the past weeks experience with our Climb Kili vehicle waiting to transfer you to your hotel for a very welcomed shower! Overnight stay at bed and breakfast.
Day 9 + : Optional Safari
This list will serve as a good overview, however, depending on the time of year you decide to climb Kili, things may change.
Pack & Bags
Upper Body
We recommend a minimum of five upper body layers, all of which can be used in conjunction with each other. Two of these should be insulating layers, one light and one medium, that fit well together. Today there are many different layering systems to choose from, including fleece, soft-shell, down and synthetic options.
Lower Body
We recommend a system of four layers, all of which can be used in conjunction with each other. Products which combine several layers into one garment, such as traditional ski pants, don’t work well as they don’t offer the versatility of a layering system.
Feet
Miscellaneous
Toilet
Personal Medications
Utensils
Optional Items
Travel Documents
Pre-Trip Checklist
Pack & Bags
- 2 DUFFEL BAG(S): A 120+ liter bag made of tough material.
- BACKPACK: A 90+ liter pack is the recommended size for this climb. Your pack must be large enough for your layers, climbing gear, and food, as well as a portion of your tent and group load (kitchen equipment).
- DAY PACK: A 25+ liter day pack to use as carry-on, while traveling or sightseeing.
- SLEEPING BAG: A bag rated to 0° to -20° F. Either goose down or synthetic, with ample room for movement. Most guides prefer down, because it is lightweight and compactable. A waterproof bag is preferred, but not mandatory.
- COMPRESSION STUFF SACK FOR SLEEPING BAG
- SLEEPING PAD - INFLATABLE: A full-length inflatable pad.
- SLEEPING PAD - CLOSED FOAM: A second full-length or 3/4 length closed cell foam pad. This pad is used in combination with the first sleeping pad. You will be happy to have both!
- ICE AXE/PICK: The length of your axe depends on your height. Use the following general mountaineering formula: up to 5'8", use a 65 cm axe; 5'8" to 6'2", use a 70 cm axe; and taller, use a 75 cm axe. If you hold the axe so that it hangs comfortably at your side, the spike of the axe should still be a few inches above the ground.
- CLIMBING HARNESS: HARNESS IS NOT REQUIRED FOR THIS TRIP
- HELMET: Should be a climbing certified helmet.
- CRAMPONS: The 10 to 12 point adjustable crampons designed for general mountaineering are ideal.
- TENT: four season
- TREKKING POLES: Lightweight and collapsible poles are preferred. Larger baskets work well with deep snow. Ski poles will also work.
- Head: Keep your Cabeza warm
- Wool or synthetic. It should provide warmth but also be thin enough to fit underneath a climbing helmet.
- BUFF / NECK GAITER / BALACLAVA: One item for face protection is required. Our primary recommendation is the Buff. A neck gaiter or balaclava is also acceptable.
- BALL CAP OR SUN HAT
- Box GLACIER GLASSES: A pair of dark-lensed sunglasses with side shields or full wrap-type sunglasses.
- GOGGLES: Amber or rose-tinted goggles for adverse weather.
- HEADLAMP: Be sure to begin the program with fresh batteries.
- Hands: Each glove layer is worn separately as conditions change during the climb.
- LIGHT WEIGHT GLOVE: One pair of fleece, soft-shell or wind-stopper gloves.
- MEDIUM WEIGHT GLOVE: Wind/water resistant, insulated mountain gloves.
- HEAVY WEIGHT INSULATED GLOVE OR MITTEN: Wind/water resistant, insulated gloves or mittens. These also serve as emergency back-ups if you drop or lose a glove.
Upper Body
We recommend a minimum of five upper body layers, all of which can be used in conjunction with each other. Two of these should be insulating layers, one light and one medium, that fit well together. Today there are many different layering systems to choose from, including fleece, soft-shell, down and synthetic options.
- 2 LIGHT TO MEDIUM WEIGHT BASELAYER: Long-sleeve wool or synthetic top. Quarter zip styles will allow for better temperature regulation. We recommend light colors, which best reflect the intense sun on hot days.
- INSULATING LAYER - LIGHTWEIGHT
- INSULATING LAYER - MEDIUM WEIGHT
- HARD SHELL JACKET: A jacket made of rain/wind-proof material with an attached hood.
- INSULATED PARKA with HOOD:
- HIKING SHIRT (OPTIONAL): For hot days in mid-summer, we recommend a lightweight, synthetic shirt, either long or short sleeves. Long sleeves are preferred for sun protection.
Lower Body
We recommend a system of four layers, all of which can be used in conjunction with each other. Products which combine several layers into one garment, such as traditional ski pants, don’t work well as they don’t offer the versatility of a layering system.
- 2 - 3 UNDERWEAR: Non-cotton briefs or boxers.
- LIGHT TO MEDIUM WEIGHT BASELAYER: Synthetic or wool.
- CLIMBING PANT: Soft-shell climbing pants offer a wide range of versatility. You can wear them in combination with the base layer on colder days, or alone on warmer days. No cotton!!
- RAIN PANT (HARD SHELL): A waterproof pant with 3/4 side zippers (sometimes called 7/8 or full side zips) are required for facilitating quick clothing adjustments over boots and crampons.
- SYNTHETIC INSULATED PANT: A synthetic primaloft pant.
- LIGHT WEIGHT TREKKING PANT: A lightweight, synthetic pair of pants is a good option for the approach trek when hiking at lower altitudes and in warm conditions.
Feet
- MOUNTAINEERING BOOTS: Hybrid boots are the preferred choice on Aconcagua. They provide the best insulation as well as a more rigid sole for kicking steps and holding crampons. Leather-only mountaineering boots are not recommended.
- HIKING BOOTS: A pair of lightweight boots for approaches and hiking on rugged terrain.
- LIGHTWEIGHT HIKING SHOES: Great for travel, day hikes, and camp.
- SANDALS: These are used during river crossings and should hold securely to the foot. There is also a shower at Basecamp.
- 2 PAIR OF TREKKING SOCKS: Lightweight hiking socks for the trek to Basecamp.
- 3 PAIR OF CLIMBING SOCKS: Either wool or synthetic. Some people find liner socks useful for reducing friction. Keep a clean pair for summit day, you will be happy you did!
- GAITERS: large enough to fit over your mountaineering boots.
Miscellaneous
- LIP BALM: We recommend SPF 15 or higher.
- SUNSCREEN: We recommend small tubes of SPF 15 or higher, which can be carried in pockets for easy access and to prevent freezing.
- MEALS: See the Food tab for suggestions and quantities.
- CHEMICAL HAND and TOE WARMERS
- 2 - 3 WATER BOTTLES: Hard-sided, screw-top, one-liter water bottles with wide mouths are required.
- INSULATED WATER BOTTLE COVERS: These help prevent liquids from freezing. It should completely cover the bottle.
- WATER PURIFICATION SYSTEM
- GARBAGE BAGS (LARGE): We recommend lining your backpack with garbage bags to keep items in your backpack completely dry.
- EAR PLUGS
- 2 SETS ALKALINE BATTERIES
- 2 LUGGAGE LOCKS: For your duffel bags. Must be TSA approved.
- STUFF SACKS
- CAMERA: Don't forget your camera!
- THERMOS: High quality, lightweight, unbreakable 1/2 to 1 quart.
- COUGH DROPS
- DUCT TAPE: A small roll of duct tape always comes in handy for repairs.
Toilet
- TOOTHBRUSH AND TOOTHPASTE
- BABY WIPES
- HAND SANITIZER(S): Personal size (2 oz.) bottle.
- 2 ROLLS OF TOILET PAPER
- PEE BOTTLE (PEE FUNNEL FOR WOMEN): You are not going to want to get out of your tent at night. . .
- BAND-AIDS
- ASPRIN / IBUPROFEN / TYLENOL
- BLISTER TREATMENT
- ANTACIDS
- IMODIUM (ANTI-DIARRHEA)
- PEPTO-BISMOL (STOMACH RELIEF)
- SMALL ROLL OF ADHESIVE TAPE
Personal Medications
- ANTIBIOTICS: Broad spectrum antibiotics for Traveler's Diarrhea.
- TYLENOL #3: Tylenol 3 for pain
- ACETAZOLAMIDE: For Altitiude Illness
- DEXAMETHAZONE: For HACE.
Utensils
- BOWL
- INSULATED MUG
- SPOON or SPORK
- POCKETKNIFE
Optional Items
- HIKING SHORTS: Good for lower elevations and warm, sunny days.
- READING MATERIAL / JOURNAL
- MUSIC PLAYER
Travel Documents
- PASSPORT: Valid for six months beyond your return date.
- COPY OF PASSPORT: The first two pages of your passport.
- COPY OF FLIGHT ITINERARY
- EXTRA PASSPORT PHOTOS
Pre-Trip Checklist
- Purchase travel insurance.
- Return the Registration Packet
- Purchase airplane tickets.
- Reserve rental equipment.
- Be in the Best Shape of Your Life!
All food will be provided by our guide service. Every meal on the mountain will be covered in the price of the climb and it is good! Who would have ever thought you would be at 15,000 feet eating with a table cloth and a fresh cup of coffee/tea. You will really love each meal! We encourage you bring a few of your 'comfort' snack items.
Any fitness level and any mountaineering experience. Our annual group is made up of largely amateur mountaineers. We will review a training schedule and help you get in the best shape of your life!
You will work with our Travel agents flying into Tanzania.
This will be included in our introductory packet.
Information coming soon.
